Delicious Homemade Paska for Easter Celebrations
Delicious Homemade Paska for Easter Celebrations: A Tropical Delight
Introduction to Delicious Homemade Paska for Easter Celebrations
As spring arrives, so does the joyous season of Easter, bringing with it the perfect opportunity to indulge in delightful spring meals like Paska. This traditional bread, often enjoyed during Easter celebrations, is not only rich in flavor but also offers simplicity in preparation. Our homemade Paska recipe will guide you through each step, ensuring even novice bakers can create this aromatic treat with ease.
Paska is a sweet bread with Slavic roots, meaning you can enjoy it in various forms, making it ideal for everyone at the table. Whether you’re a busy parent seeking easy recipes, a health-conscious individual looking for nutritious options, or a newlywed eager to impress, Paska fits all needs. This version can also be customized for dietary preferences, including vegan and gluten-free adaptations. Prepare to bring a taste of tradition into your home with this delightful recipe, which not only celebrates Easter but serves as a reminder of the joy of sharing homemade spring meals with family and friends.
Benefits and Advantages of Delicious Homemade Paska for Easter Celebrations
There are numerous reasons to consider making Delicious Homemade Paska for your Easter celebrations. First and foremost, this recipe impresses with its simplicity. With straightforward steps and accessible ingredients, it’s perfect for even the less experienced home cook. Families can involve kids in the baking process, cultivating a sense of togetherness.
Moreover, homemade Paska is often a healthier alternative to store-bought versions. Using fresh ingredients allows you to control added sugars and unhealthy fats that often lurk in commercial options. This bread is easily adaptable, meaning you can opt for organic ingredients or substitute with healthier alternatives. The result is a sweet treat that is not only satisfying but guilt-free.
Vegan? Gluten-free? No problem! Countless adaptations mean that everyone can enjoy this delightful bread at the Easter brunch table. This inclusivity makes Delicious Homemade Paska a standout choice; it can cater to various dietary needs without compromising on taste.
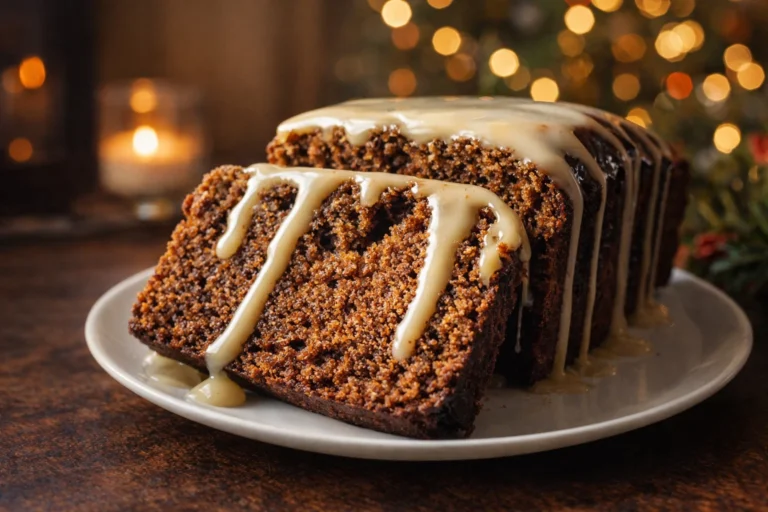
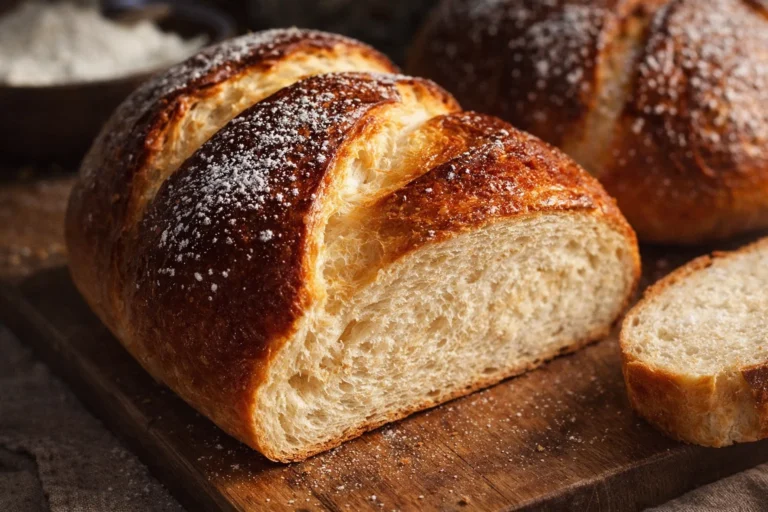
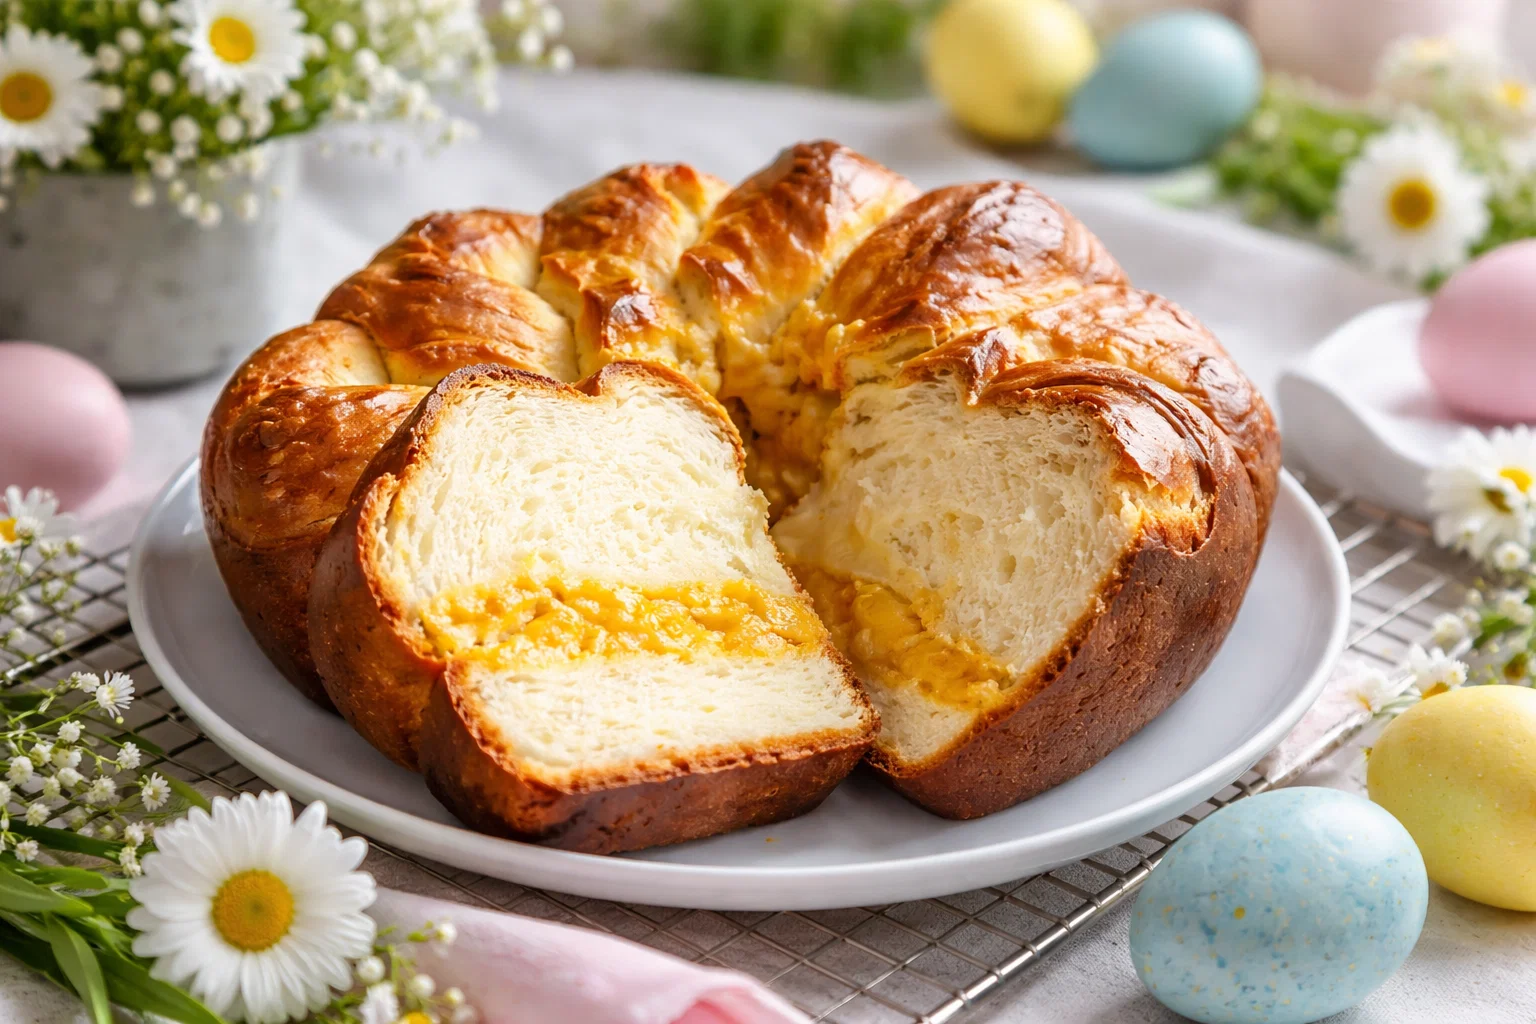
Picture this: a warm, fragrant loaf of homemade Paska, adorned with a light glaze and maybe even colorful sprinkles, sitting at the center of your holiday feast. The sight alone is enough to draw everyone in. Most importantly, it embodies the spirit of sharing and togetherness that at the heart of Easter celebrations—making it a cherished addition to your spring meals.
Ingredients Overview
Essential Ingredients for Delicious Homemade Paska for Easter Celebrations
To create a truly sumptuous Paska, gather the following ingredients:
- 4 cups all-purpose flour (or gluten-free flour blend)
- 1 cup whole milk (or almond/oat milk for a vegan alternative)
- 1/2 cup sugar (or coconut sugar for a lower-calorie option)
- 1/2 cup unsalted butter (or coconut oil for a dairy-free variant)
- 3 large eggs (or flaxseed eggs for vegan adaptation)
- 2 teaspoons active dry yeast
- 1 teaspoon vanilla extract
- 1/2 teaspoon salt
- Zest of 1 lemon (for enhanced flavor)
- 1/2 cup raisins or dried cranberries (optional)
- Sprinkles or icing for decoration (optional)
Each ingredient plays a crucial role in the final taste and texture of your Paska. For example, the flour gives it structure while the sugar adds sweetness. Milk provides moisture, making your loaf tender, while eggs contribute to its rich flavor and help bind the dough.
Gluten-Free and Vegan Options
For those needing gluten-free or vegan options, simply substitute the all-purpose flour with a gluten-free blend and opt for plant-based milk and egg replacements. This ensures everyone can partake in the joy of homemade Paska without compromising taste or texture.
Dietary Substitutions to Customize Your Delicious Homemade Paska for Easter Celebrations
Customizing your Paska recipe is easy and allows you to cater to specific dietary preferences:
- Vegan: Replace eggs with flaxseed eggs (1 tablespoon flaxseed meal mixed with 2.5 tablespoons water for each egg) and swap butter for coconut oil.
- Gluten-Free: Use a 1:1 gluten-free flour blend to maintain the bread’s lovely structure.
- Lower Calorie: Substitute regular sugar with stevia or monk fruit sweetener. Use unsweetened applesauce as a replacement for butter.
By employing these substitutions, your Delicious Homemade Paska will not only accommodate diverse dietary needs but also remain a favorite for all who taste it.
How to Prepare the Perfect Delicious Homemade Paska for Easter Celebrations: Step-by-Step Guide
Creating the perfect Paska takes just a few steps:
-
Prepare the Yeast: In a small bowl, combine warm milk, one tablespoon of sugar, and the active dry yeast. Let it sit for about 5-10 minutes until frothy.
-
Mix Dry Ingredients: In a large bowl, whisk together flour, remaining sugar, and salt.
-
Combine Wet Ingredients: Add the melted butter, eggs, lemon zest, and vanilla extract to the frothy yeast mixture, stirring well to combine.
-
Combine Mixtures: Pour the wet ingredients into the dry mixture, stirring until a dough begins to form.
-
Knead the Dough: Transfer the dough to a floured surface and knead for about 10 minutes until smooth and elastic. This step may require additional flour, depending on humidity levels.
-
First Rise: Place the dough in a greased bowl, cover it with a clean kitchen towel, and let it rise in a warm place for about 1-2 hours, or until it doubles in size.
-
Add Fruits: If you choose to include raisins or dried cranberries, gently fold them into the dough once it has risen.
-
Shape the Dough: Punch down the dough to release excess air. Shape it into a loaf, tucking the ends underneath, and place it in a greased loaf pan.
-
Second Rise: Cover with a towel and let the dough rise for another 30-45 minutes until it’s fluffy again.
-
Preheat Oven: While the dough is rising for the second time, preheat your oven to 350°F (175°C).
-
Bake the Paska: Once risen, bake your Paska for 30-35 minutes or until golden brown on top and it sounds hollow when tapped.
-
Cool and Decorate: Allow it to cool in the pan for about 10 minutes, then transfer to a wire rack. Once completely cooled, drizzle with icing and add sprinkles if desired.
Remember, variations in the baking process can be navigated by adjusting ingredients based on dietary preferences, ensuring a delicious end result that suits everyone’s taste.
Mastering Delicious Homemade Paska for Easter Celebrations: Advanced Tips and Variations
Baking Paska can be a creative process! Here are some advanced tips and variations to take your homemade bread to the next level:
-
Flavored Variations: Consider adding spices like nutmeg or cardamom for a warming flavor. You could also experiment with citrus flavors by adding orange zest alongside or instead of lemon.
-
Fruit and Nut Medley: Incorporate ground nuts for added nutrition, or fold in different dried fruits such as figs or apricots.
-
Different Shapes: Try shaping your Paska into braids or rolls instead of a standard loaf to present a more visually appealing dish.
-
Creative Toppings: Swapping out traditional icing for a lemon glaze or a simple sprinkle of powdered sugar can add a personal touch.
-
Use of Vanilla Beans: For an added depth of flavor, consider using fresh vanilla beans instead of extracts.
Taking advantage of these tips can elevate your Delicious Homemade Paska, adding personal flair while retaining its heartfelt essence suitable for your Easter brunch.
How to Store Delicious Homemade Paska for Easter Celebrations: Best Practices
Storing your Paska correctly ensures it stays fresh and delicious for as long as possible. Here are some effective tips:
-
Refrigeration: If you plan to store your Paska for up to a week, wrap it in plastic wrap or place it in an airtight container and keep it refrigerated.
-
Freezing: To preserve your bread for longer, wrap it tightly in plastic wrap and then in aluminum foil before placing it in the freezer. Paska can be frozen for up to three months. When ready to enjoy, simply thaw in the refrigerator overnight and reheat in the oven.
-
Reheating: For an authentic fresh-baked taste, warm the Paska in a preheated oven at 300°F (150°C) for about 10-15 minutes. This helps maintain its texture and flavor.
Utilizing these storage techniques ensures you can enjoy your homemade Paska beyond just Easter—making it a versatile addition to your spring meals.
Nutritional Value of Delicious Homemade Paska for Easter Celebrations
Understanding the nutritional content of your Delicious Homemade Paska can help you incorporate it into a balanced diet. Here’s a breakdown of approximate values per slice (based on a recipe made with standard ingredients):
- Calories: 180
- Total Fat: 6g
- Saturated Fat: 3g
- Cholesterol: 35mg
- Sodium: 180mg
- Total Carbohydrates: 30g
- Dietary Fiber: 1g
- Sugars: 8g
- Protein: 4g
Please note that these values may vary based on ingredient choices and serving size. Additionally, using plant-based substitutes and reducing sugar can make it lower in calories or better suited to specific dietary preferences, ensuring it meets the needs of your guests while remaining a delightful component of your spring meals.
FAQs: Frequently Asked Questions About Delicious Homemade Paska for Easter Celebrations
Can I make Paska ahead of time?
Absolutely! You can prepare the dough the night before and refrigerate it after the first rise. The next day, shape it, allow it to rise, and bake.
What can I use instead of eggs?
Flaxseed eggs (1 tablespoon flaxseed meal + 2.5 tablespoons water) work well as a vegan substitute for eggs in this Paska recipe.
How can I make my Paska gluten-free?
Simply substitute all-purpose flour with a high-quality gluten-free flour blend. The flour blend ensures that the bread rises and maintains its shape.
Can I use other kinds of milk?
Yes! Oat milk, almond milk, or any preferred plant-based milk can be used as substitutes for whole milk.
How long can I store Paska?
If stored properly, your Paska can stay fresh for up to one week in the refrigerator or up to three months if frozen.
What are some good toppings for Paska?
Traditional toppings include a light icing made from powdered sugar, milk, and vanilla, or you could simply dust powdered sugar over the top for a simple finish.
By addressing these common inquiries, you can feel confident in crafting a memorable Delicious Homemade Paska for your Easter celebrations, ensuring that it becomes a cherished tradition for years to come. Incorporating this delightful bread into your festive menu will surely elevate your spring meals and create lasting memories with family and friends. Enjoy the flavors, the joy, and the togetherness that Paska brings during this special time of year!