Easy Homemade Artisan Bread Recipe Ideas
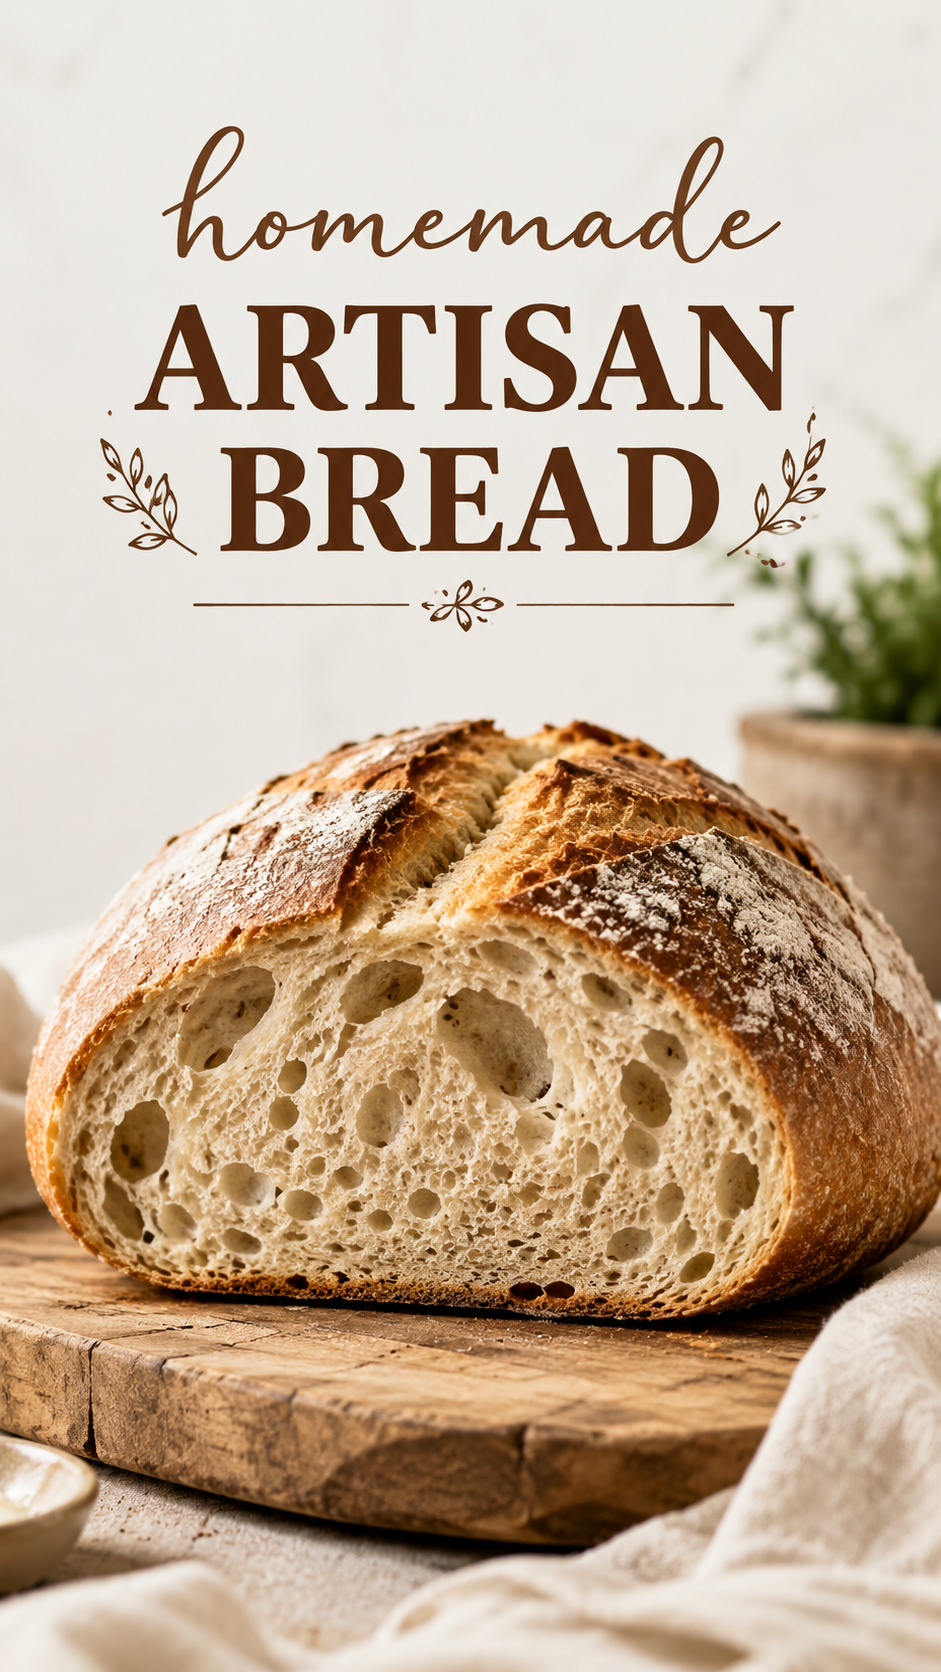
There is something special about a loaf of homemade artisan bread: a crisp, beautifully browned crust surrounding a soft, airy center filled with naturally irregular holes. This rustic style of bread looks impressive, yet it can be made with a surprisingly simple approach at home. If you love fresh bread, easy baking projects, and comforting homemade recipes, artisan bread is a wonderful recipe idea to add to your kitchen routine.
Key Takeaways
- Homemade artisan bread can create a crisp crust and airy interior.
- Simple ingredients can produce impressive bakery-style results.
- Proper dough hydration helps create an open, rustic crumb.
- Gentle handling helps preserve the dough’s natural air pockets.
- Allowing the loaf to cool before slicing improves its texture.
What Makes Homemade Artisan Bread So Special?
Artisan bread is all about texture, simplicity, and the character of a handmade loaf. Unlike soft sandwich bread, a rustic artisan loaf typically has a substantial golden crust and a tender interior with uneven air pockets. Those irregular holes are part of its charm and give each loaf a distinctive appearance.
The beauty of this recipe idea is that it does not need to look perfectly uniform. In fact, the rustic appearance is exactly what makes artisan bread so appealing. A slightly uneven shape, crackled crust, and open crumb all contribute to that classic bakery-inspired look.
Important: Resist the temptation to overwork the dough. Gentle handling can help preserve the air bubbles that contribute to the light, open texture associated with rustic artisan bread.
Simple Ingredients for a Rustic Loaf
One of the biggest reasons homemade artisan bread remains such a popular baking project is its straightforward ingredient list. You generally need flour, water, yeast, and salt. These basic ingredients work together to create a loaf with remarkable flavor and texture.
- Flour: Provides the structure for the bread and forms the foundation of the dough.
- Water: Hydrates the flour and helps create the desired dough consistency.
- Yeast: Helps the dough rise and contributes to its airy texture.
- Salt: Enhances flavor and helps balance the overall dough.
Because the ingredient list is so short, the process matters. Small details such as dough consistency, fermentation time, shaping, and baking conditions can have a noticeable effect on the final loaf.
How to Make Easy Homemade Artisan Bread
Making artisan bread is less about complicated techniques and more about giving the dough enough time and treating it carefully. The exact process can vary depending on the recipe, but the general method is easy to understand.
1. Mix the Dough
Begin by combining the flour, water, yeast, and salt. Mix until the ingredients come together into a shaggy dough. It does not need to look perfectly smooth at this stage. The goal is simply to make sure the flour is evenly moistened.
Artisan dough may feel wetter or stickier than traditional sandwich bread dough. That is not necessarily a problem. A higher-moisture dough can contribute to a lighter, more open crumb when handled correctly.
2. Let the Dough Rise
Once mixed, the dough needs time to ferment and develop. During this stage, the yeast produces gases that become trapped within the dough, creating the bubbles that eventually give the bread its airy interior.
Keep the dough covered while it rests so the surface does not dry out. The dough should become noticeably more expanded and lively as fermentation progresses.
3. Shape It Gently
When the dough has risen, turn it out carefully and shape it into a rustic round or another simple loaf shape. Avoid pressing all the air out of the dough. Those pockets are valuable because they help create the open crumb that makes artisan bread so visually appealing.
A light touch is often better than aggressive kneading at this stage. Shape the dough enough to give it structure, but do not worry about achieving a perfectly smooth or symmetrical loaf.
Expert Insight
The dramatic holes in an artisan loaf are not a sign that something went wrong. Uneven air pockets are one of the defining visual characteristics of rustic bread. Focus on developing good dough structure and handling the dough gently rather than trying to make every part of the crumb identical.
4. Prepare for Baking
Before baking, the shaped loaf can receive a few simple cuts across the surface. Scoring gives expanding dough a controlled place to open as it bakes and can also create an attractive bakery-style finish.
A properly prepared baking environment is important for achieving a well-developed crust. Artisan bread benefits from strong heat and a baking setup that supports good moisture management during the early part of baking.
5. Bake Until Deeply Golden
Bake the loaf according to your chosen recipe until the crust is deeply golden and the bread looks fully set. The exterior should develop a firm, crisp texture while the interior remains tender.
Do not judge the bread only by its appearance. A beautiful crust is important, but the loaf also needs enough time to finish baking internally. If the center remains underbaked, the crumb can become gummy rather than light and tender.
Tips for a Better Artisan Bread Crust
The crust is one of the most satisfying parts of homemade artisan bread. That crackly exterior provides a wonderful contrast to the soft interior, making every slice feel like something from a neighborhood bakery.
- Preheat thoroughly: Give your oven enough time to reach the required temperature.
- Protect the dough from drying: Keep the dough covered during resting periods.
- Handle gently: Preserve as much of the dough’s internal structure as possible.
- Score before baking: Simple cuts can improve both appearance and expansion.
- Allow cooling time: Let the loaf settle before cutting for a better crumb.
Pro Tip: If you want those beautiful irregular holes seen in rustic artisan bread, focus on dough development and gentle shaping rather than trying to create the holes manually. The fermentation process does much of the work for you.
Why Resting the Bread Before Slicing Matters
Freshly baked bread smells irresistible, so waiting can be difficult. However, slicing a loaf immediately after it leaves the oven can interfere with the final texture. The interior continues to settle as the bread cools, allowing the crumb to become more stable.
For the cleanest slices and the best texture, give the loaf time to cool before cutting into it. Once cooled, use a sharp serrated bread knife and a gentle sawing motion. This helps preserve the delicate crumb instead of crushing it.
How to Serve Homemade Artisan Bread
A rustic loaf is incredibly versatile. Thick slices are delicious simply spread with butter, while toasted pieces can become the foundation for breakfast, lunch, or a quick snack. The crisp crust and chewy interior also make artisan bread a natural companion for soups, salads, roasted vegetables, and comforting dinners.
For a simple serving idea, toast a slice until lightly crisp and top it with your favorite ingredients. You can keep it savory with cheese, vegetables, or herbs, or choose a sweeter combination with fruit and a drizzle of honey.
Artisan bread also works beautifully when you want to make an ordinary meal feel more special. A warm loaf placed in the center of the table instantly creates a cozy, homemade atmosphere.
Common Mistakes to Avoid
New bakers sometimes assume that bread needs constant attention, but unnecessary handling can actually make the process harder. Avoid adding excessive flour simply because the dough feels sticky. The dough’s consistency is an important part of the final result.
Another common mistake is rushing the rise. Bread dough needs time to ferment and develop its structure. If you move too quickly through the process, you may end up with a loaf that is dense rather than airy.
Finally, avoid cutting into the loaf too soon. The aroma may be tempting, but patience gives the crumb time to finish setting and makes the finished bread easier to slice.
At a Glance
- Use simple ingredients and focus on dough consistency.
- Give the dough enough time to rise and develop.
- Shape gently to preserve natural air pockets.
- Bake until the crust is richly golden and firm.
- Cool before slicing for the best crumb.
A Simple Recipe Idea Worth Saving
Homemade artisan bread is a reminder that impressive baking does not always require complicated ingredients or elaborate techniques. With a few pantry staples, thoughtful preparation, and a little patience, you can create a rustic loaf with a beautiful golden crust and an inviting, airy center.
Whether you are an experienced home baker or simply looking for a rewarding recipe idea to try on a quiet weekend, artisan bread is an excellent choice. The process is satisfying, the aroma is unforgettable, and the finished loaf can turn even a simple meal into something special.
Conclusion
There is plenty to love about homemade artisan bread. Its rustic appearance, crisp crust, and soft, irregular crumb make it both beautiful and delicious. More importantly, baking a loaf from scratch offers the kind of simple kitchen experience that feels rewarding from the first mix to the final slice.
Keep this recipe idea handy whenever you are in the mood for homemade comfort food or want to fill your kitchen with the aroma of freshly baked bread. With practice, you can become more comfortable recognizing dough consistency, shaping gently, and creating the texture you enjoy most. Start simple, be patient, and let the bread’s natural character shine.